Win7 64bit on Ubuntu Virtualbox Error
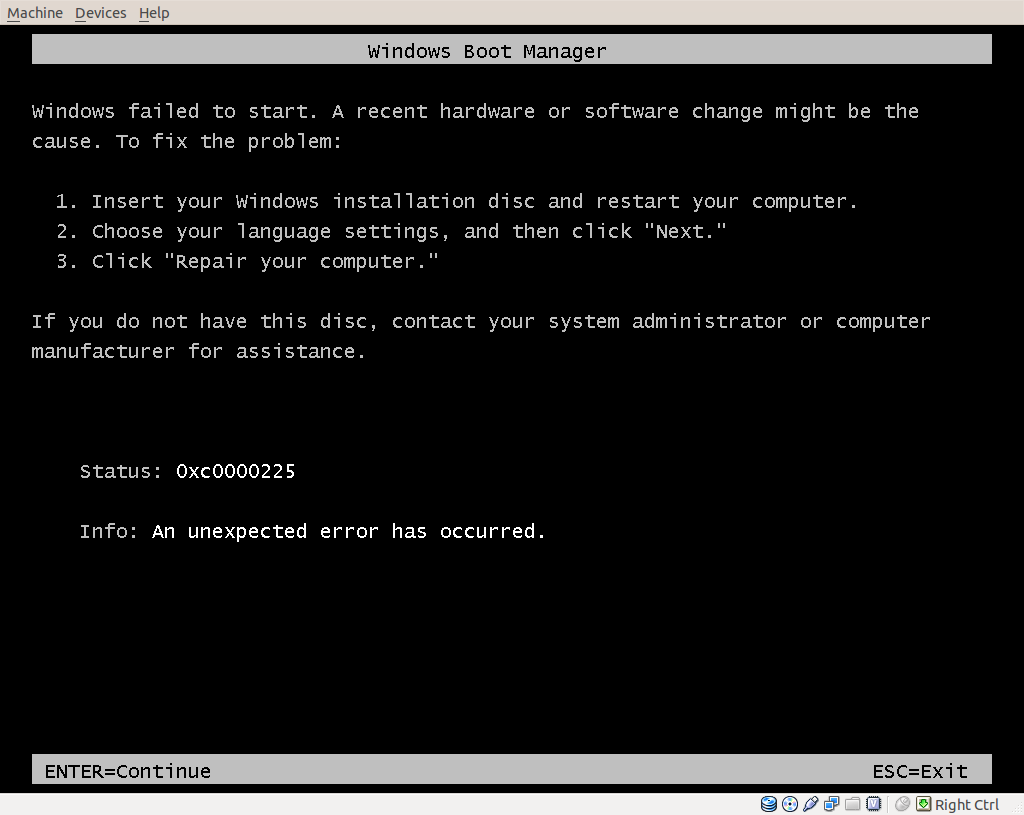
If you’re getting an error that “Windows failed to start” while trying to install 64bit Windows 7 on a Virtualbox machine with an Ubuntu host, then you’ll appreciate the following fix.
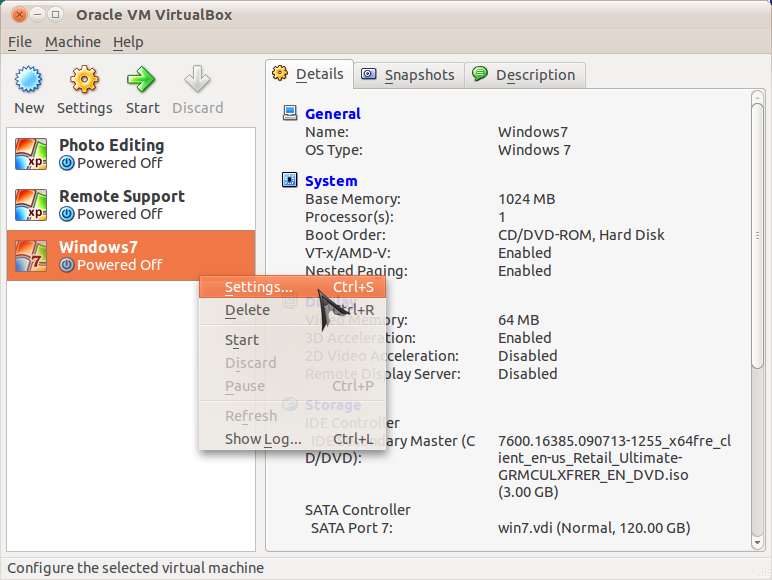
Go ahead and open Virtualbox. Right-click the virtual machine that you intend use for the Windows 7 installation. Then click “settings”.
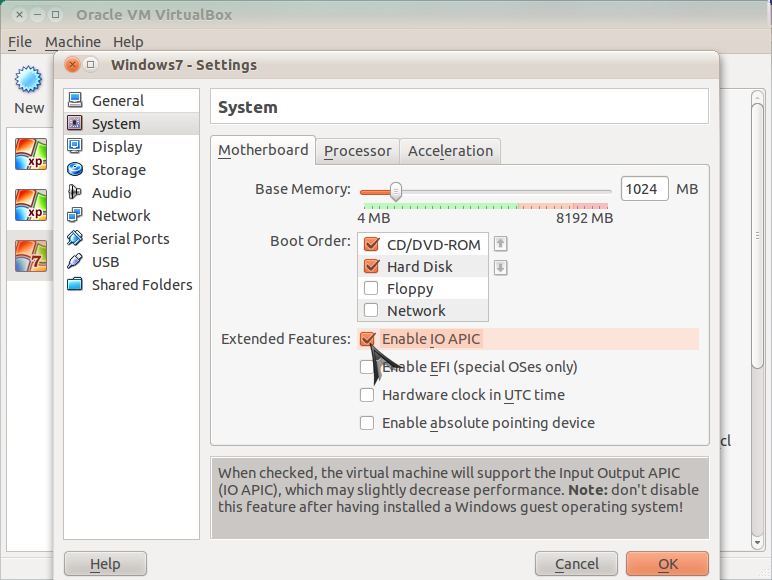
In the settings box that appears, click “System”.
Now, check the box that reads “Enable IO APIC” and then click “OK”. At this point, you should be able to boot up the virtual machine without seeing the error message.
However, you may get a new error… that windows cannot install to your disk. In that case, you’ll need to change the type of controller your virtual machine uses for the virtual disk.
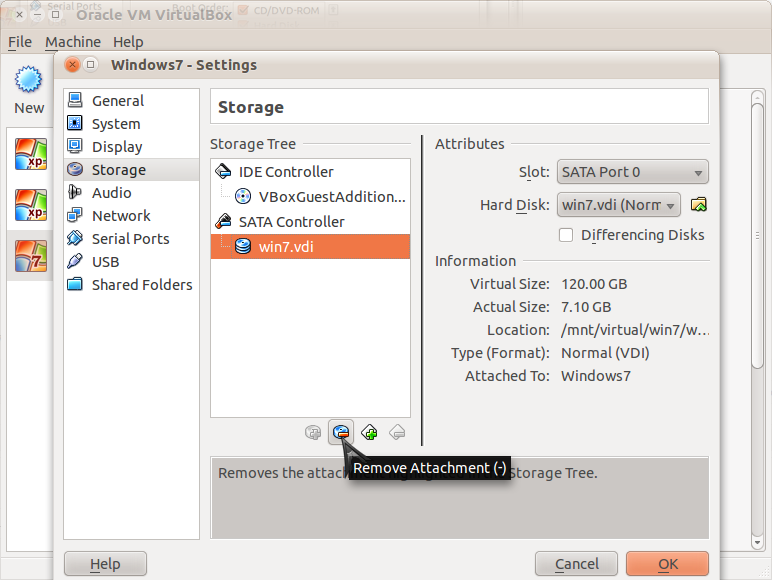
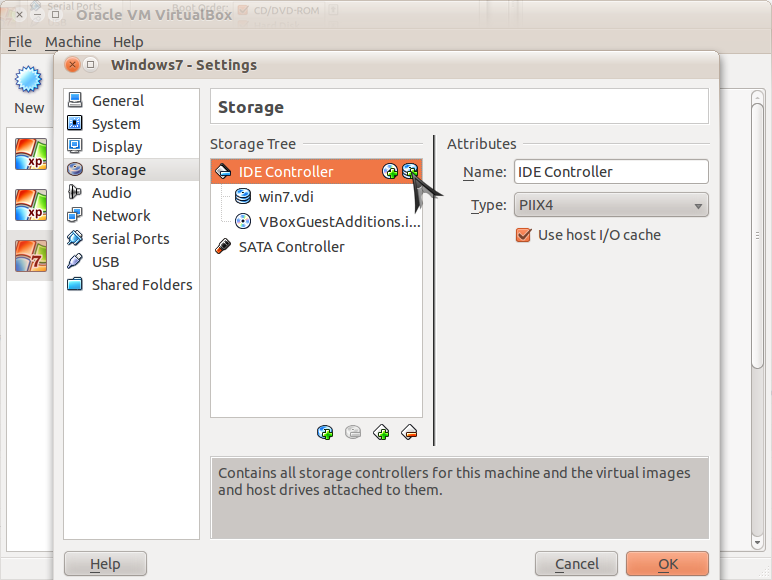
So, select “Storage” from the options on the left and, if you see that your virtual disk is attached to an SATA controller, remove it.
Now select the IDE controller and attach the virtual disk to it using the button directly to the right.
Now you can launch your virtual machine and proceed with your Windows 7 installation.
